Add and manage nodes
Create nodes, get people signed in, and import many at once.
ForOwnerAdmin
Nodes live under Members, Nodes & Roles, on the Nodes tab.
Add a node
You need at least one group first. If you have none, Orbit offers Create a group.
- Click Add, then Node.
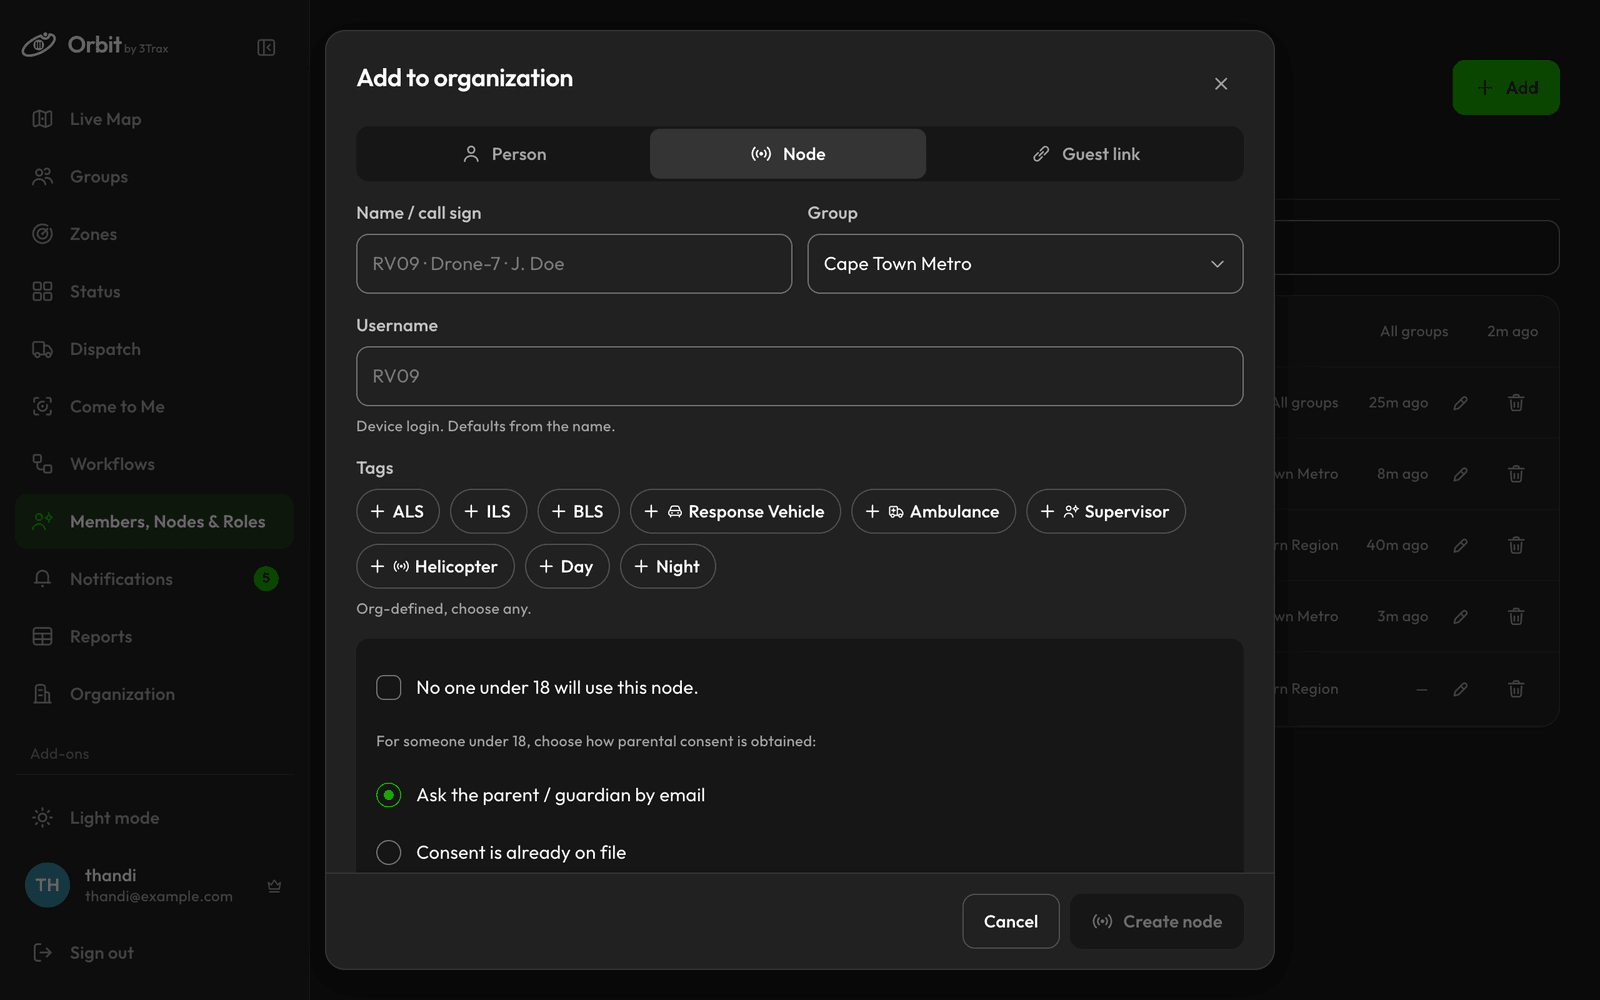
- Enter a Name / call sign and choose a Group. The login username is filled in from the name, and you can change it.
- Say who will use it. For an adult, tick “No one under 18 will use this node.” For someone younger, see Under 18s.
- To send instructions, add an email address.
- Click Create node.
How the person signs in
What you see next depends on what you entered:
- “Node created — instructions sent”: the person gets an email with the app links and a one-time link to reveal the password.
- “Node created”: Orbit shows the org, user and pass once. Click Copy and pass them on safely, because the password isn't shown again.
The person then follows Sign in in the Node app. Your organisation's code is under Organization in General, as Node sign-in code.
Under 18s
If someone under 18 will use the node, choose how consent is given:
- “Ask the parent / guardian by email”: enter the Parent / guardian name, Relationship and Parent / guardian email. Orbit shows “Node created — consent requested”, and the phone can't sign in until they accept.
- “Consent is already on file”: confirm the certification tick. Orbit shows “Node created — consent verified”.
To see a consent record, click the consent badge on the node's row. You can also Resend consent request or Request consent again from there.
Change a node
On the Nodes tab, click the pencil on the node's row. You can change the Display name, Tags and Groups, and you can:
- Send sign-in instructions again.
- Reset password, under Device credentials. The new password is shown once.
- Log out device to sign the phone out.
Click Save changes when you're done.
Import many nodes
- On the Nodes tab, click Import nodes.
- Click Choose a CSV file. If you need a starting point, click Download a blank CSV template.
- Match your columns to Name, Email, Cell number, Under 18, Guardian name and Guardian email.
- Choose Groups, and how you're Telling them: “Email the sign-in instructions” or “Text the sign-in instructions”.
- Click the button to create the nodes.
- Click Download credentials and keep the file safe. It's the only copy.
Change several at once
Tick nodes on the Nodes tab, then choose Groups and Apply, Log out, Reset passwords or Delete.